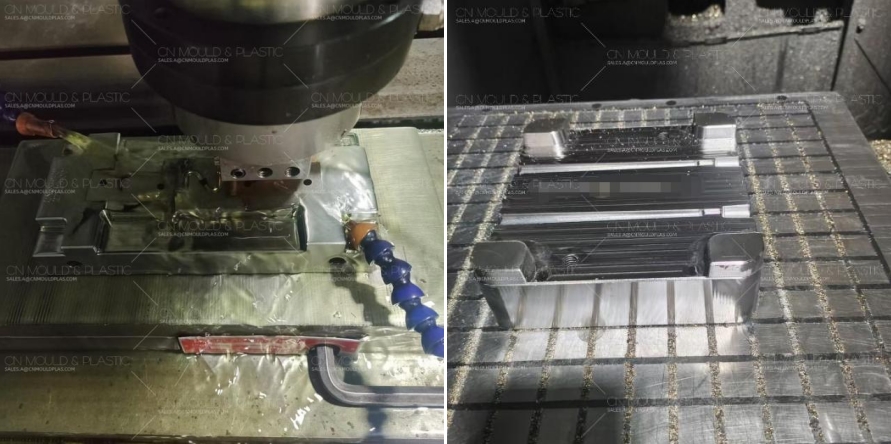
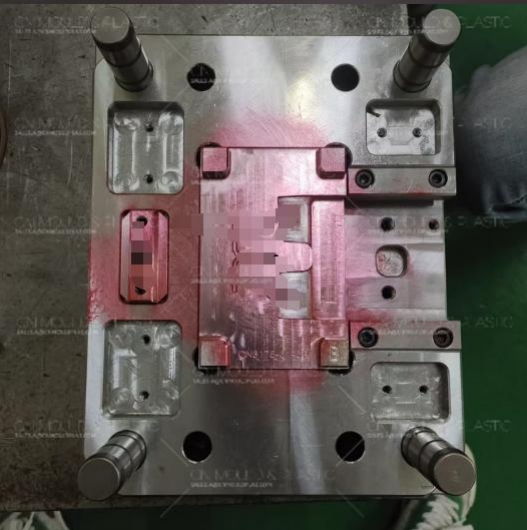
The surface quality of the convex and concave mold surfaces after machining will directly affect the working performance, service life, and reliability of the mold. The surface quality refers to the surface layer state after machining, including surface roughness, surface layer metal structure, mechanical properties, and residual stress, etc., and should meet the design requirements.
(1) Surface Roughness
The surface roughness grade of mold parts is related to the mold type and the performance requirements of the parts in use. For example, for plastic injection molds, the surface roughness value Ra required for the convex and concave mold surfaces is 0.32 - 0.16μm; for glass molds, the forming surface roughness value Ra is 1.5μm, the fitting surface roughness value Ra is 3.2μm, and the non - fitting surface roughness value Ra is 6.3μm; for rubber mold parts, the maximum allowable value of the non - fitting surface roughness value Ra is 3.2μm, and the maximum allowable value of the upper and lower surface roughness value Ra is 1.6μm. The maximum allowable value Ra for the convex and concave mold surfaces of plastic injection molds, glass molds, die - casting molds, and punching molds is only 12.5μm. Generally, the convex and concave mold surfaces of plastic injection molds, glass molds, die - casting molds, and punching molds have relatively high surface roughness requirements, as shown in Table 2 - 27. The application range of surface roughness on mold part machined surfaces is shown in Table 2 - 28.

Table 2 - 27 Surface Roughness of Precision - Machined Surfaces of Mold Parts
Mold Type | Part Surface Roughness Value Ra /μm |
Blanking Die | < 0.8 |
Drawing Die | < 0.4 |
Forging Die | < 0.8 - 1.6 |
Die - Casting Die | < 0.4 |
Plastic Injection Mold | < 0.4 |
Glass Mold | < 0.4 |
Rubber Mold | < 0.4 |
Powder Metallurgy Mold | < 2 |
Ceramic Mold | < 3 |
Table 2 - 28 Surface Roughness of Mold Parts
Surface Roughness Value Ra/μm | Application Range |
0.1 | Polished surfaces of rotating bodies |
0.2 | Polished forming surfaces and planes |
0.4 | 1. Bending, drawing, and forming convex and concave working surfaces2. Cylindrical surfaces and plane cutting edges3. Accurately sliding guide surfaces |
0.8 | 1. Forming convex and concave cutting edges2. Convex and concave insert cutting edges3. Static and transition fitting surfaces - for heat - treated parts4. Supporting, positioning, and fastening surfaces - for heat - treated parts5. Reference planes of ground surfaces6. Required accurate process datum planes |
1.6 | 1. Inner hole surfaces - for non - heat - treated parts used in fits2. Bottom plate planes |
6.3 | Surfaces that do not contact the manufactured part and mold parts |
12.5 | Rough and unimportant surfaces |

| Surfaces that do not undergo machining |
Factors Affecting the Surface Quality of Formed Parts and Their Control
To meet the requirements of users and die design, it is very important to improve, enhance, and control the quality of the working surface of formed parts.
There are many factors affecting the working surface quality of formed parts, such as materials and heat treatment processes, machining processes, electrical machining processes, finishing and surface strengthening processes, including process methods, process parameters, and the accuracy and stiffness of equipment. When formulating machining process regulations, these factors affecting the surface quality of convex and concave die surfaces need to be analyzed and designed to improve and enhance the surface quality, as shown in Table 2 - 29.

Table 2 - 29: The Role and Influencing Factors of Surface Quality
Influencing Factors | Role and Analysis | Quality Control |
|
Influence on the Fit Precision of Die Parts | 1. If the surface roughness value Ra of the working surface of the punch and die is large, the initial wear of the die hole will increase, and the clearance between the punch and die will also increase accordingly. 2. An increase in the Ra value of the guide - mating surface will destroy the oil film, resulting in dry friction; if Ra is too small, "biting" is likely to occur, accelerating surface damage and wear. 3. Affects the fatigue strength of the mold. When the convex mold is under concentrated pressure stress and alternating load, a large Ra value will cause stress concentration at the working edge, and its sharp corners and recesses are prone to form cracks, leading to fatigue damage. 4. Affects the corrosion resistance. If Ra is too large, corrosive media are likely to accumulate in the recesses, causing chemical corrosion; the wave peaks generate electrochemical corrosion. | After rough machining of parts, or blanks should be treated with aging treatment, and the Ra value should be increased. |
|
Influence of the Cold - Worked Hardened Layer on the Service Performance of the Mold | Due to excessive machining allowance, a cold - worked hardened layer is likely to be generated, resulting in micro - cracks or peeling on the surface. | Formulate a reasonable machining process and determine appropriate process parameters, such as machining allowance. |
|
Influence of Residual Stress on the Surface of the Mold | During medium - intensity grinding, the surface of quenched steel will undergo a tempering - like state, transforming martensite into sorbite. Therefore, the surface layer matrix contracts, and the lower layer is subjected to body resistance, causing residual tensile stress on the surface and residual compressive stress in the inner layer. Under re - grinding conditions, the surface layer may generate secondary quenched martensite structure, resulting in residual stress on the surface and tensile stress in the inner layer. When the residual stress reaches its limit, grinding cracks are likely to occur, affecting the service performance of the mold. | Correctly formulate grinding process and its parameters. |
|
Influence of the Surface Modified Layer after Electrical Machining | When using electrical machining processes, the surface roughness will increase with the electrical parameter. When the pulse energy is large, local high temperature is generated on the surface, resulting in electro - thermal shock and forming a "small pit", and the surface layer is hardened. During machining, the densely formed "small pits" form a surface modified layer, affecting the wear resistance of the surface. | 1. Correctly formulate electrical machining process specifications. 2. Correctly select process methods. When possible, mechanical machining can be chosen instead of electrical machining. |
|
Grinding Burn | During high - speed grinding, the grinding wheel cuts the thin - layer metal with a large negative rake angle, generating high temperature, which reduces the surface strength and hardness. In severe cases, intense friction and deformation occur, and the surface generates cracks, affecting the service performance of the mold. | Correctly formulate grinding process specifications and select grinding wheels. |
|
Influence of Electrical Discharge Machining Process Parameters on Surface Roughness | The main parameter affecting the surface roughness value Ra of electrical discharge machining is the pulse energy, which determines the depth and diameter of the "small pits" formed by electrical discharge. Another factor affecting the surface roughness value Ra of wire electrical discharge machining is the smoothness of the electrode wire movement, as well as its tension, wear, and feed rate. | 1. Reasonably formulate process specifications, mainly the single - pulse energy and frequency. 2. Reasonably determine the electrode wire movement speed and control its movement stability. |
|
Influence of Machining Process Parameters of Mechanical Cutting | 1. Vibration causes the distance between the tool and the workpiece to change periodically, increasing the surface roughness value Ra. 2. The influence of tool geometric parameters. The surface roughness value after machining has a great relationship with geometric parameters such as the tool nose radius and side cutting edge angle. | 1. Correctly select cutting parameters to make the interference deviate from the natural frequency of the machine tool system and reduce vibration. Set up anti - vibration foundations. 2. Improve the rigidity of the process system, correctly select tools, and correctly formulate machining process regulations. |
|
Methods to Improve Surface Roughness | lapping process | For surfaces processed by cutting and electrical discharge machining, knife marks of generally 30 - 50μm or the altered layer caused by electrical discharge machining are usually left. The lapping process can be adopted to remove them, which is widely used by plastic mold manufacturer in China for precision mold finishing |
|
|
honing | The purpose is to exert extrusion and polishing effects on the machined surface to improve the surface roughness and reduce the Rn value. This process is applicable to hole machining |
|
|

 English
  français
  Deutsch
  Español
  italiano
  русский
  português
  العربية
  dansk
dansk  Suomi
Suomi  Svenska
  norsk
norsk 